Google Workspace Education Plus licenses can be assigned in several different ways:
- Individual assignment
- Automatic assignment (OU)
- CSV upload
- GAM
- GCDS sync
- API access
Individual Assignment
Pros
- Easy for a small number of licenses (trial for example)
- non-technical
Cons
- Not manageable for more than just a handful of licenses
- Not scaleable
How to assign licenses individually?
Firstly, head to the admin console and head to the user directory (Admin Console > Directory).
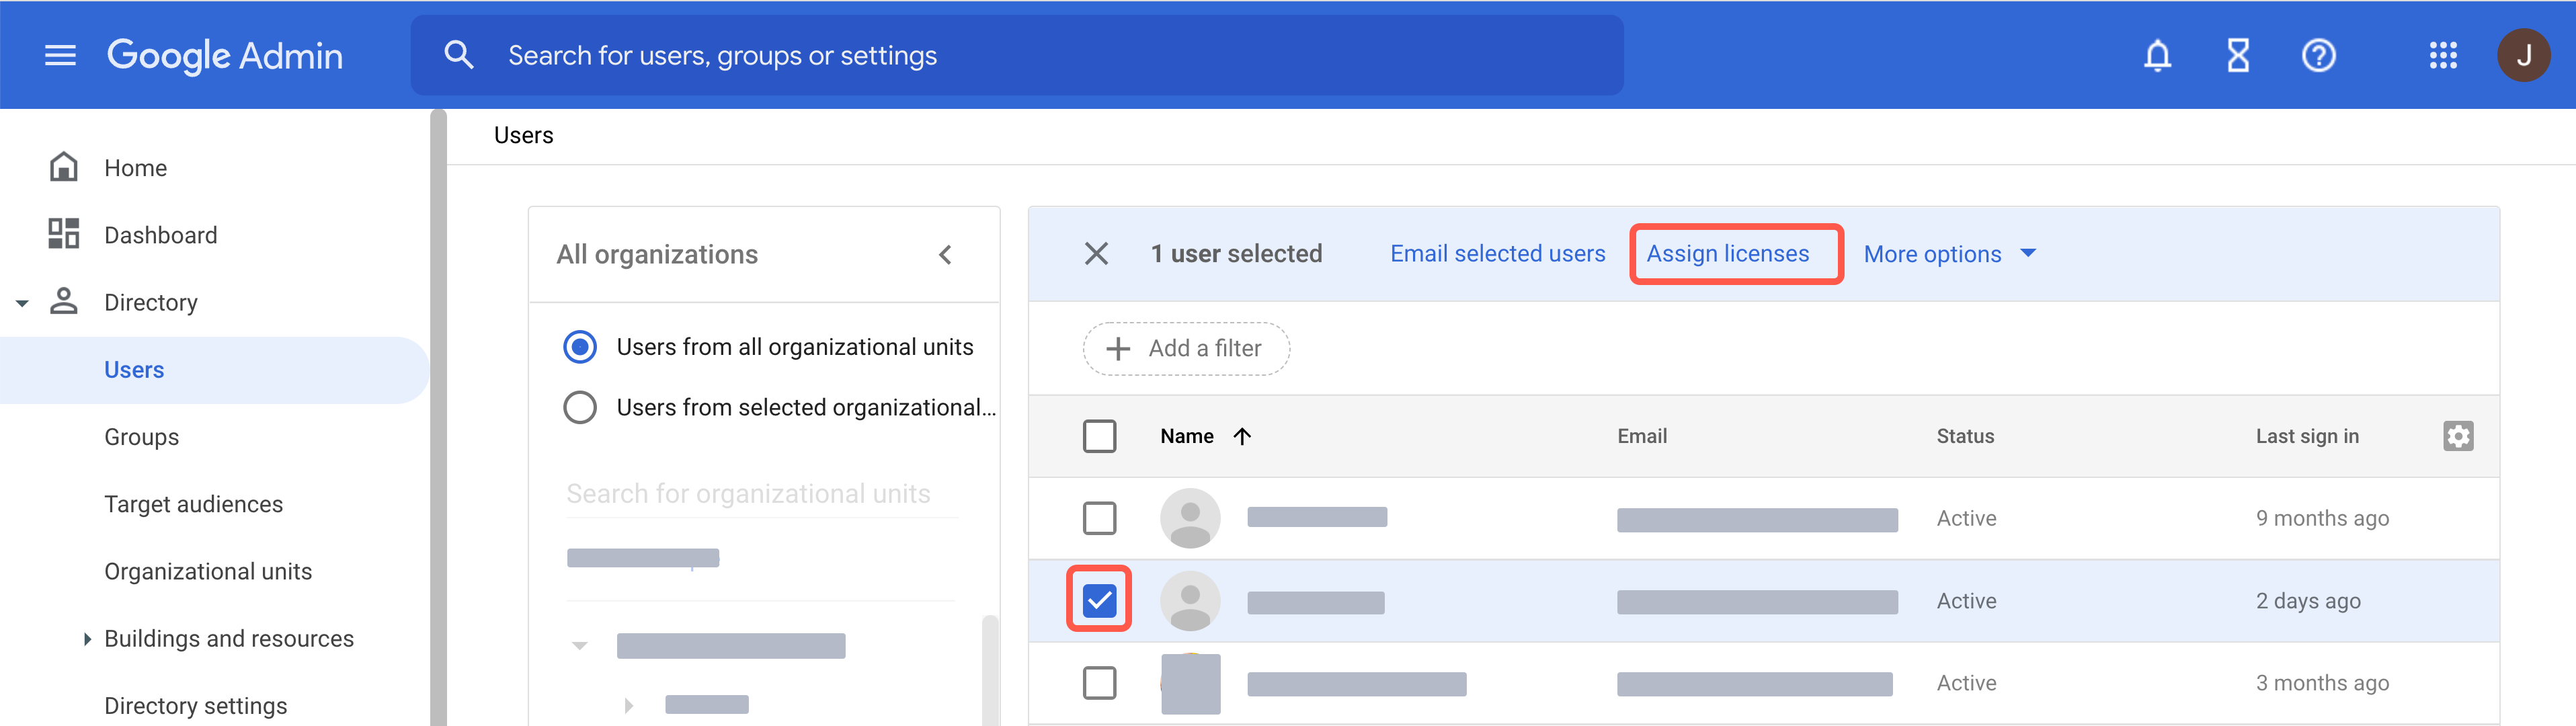
Next you will select the license to assign to this user, this works for ‘Education Plus’, ‘Education Plus (Staff)’, ‘Education Standard’, and ‘Teaching and Learning Upgrade’.
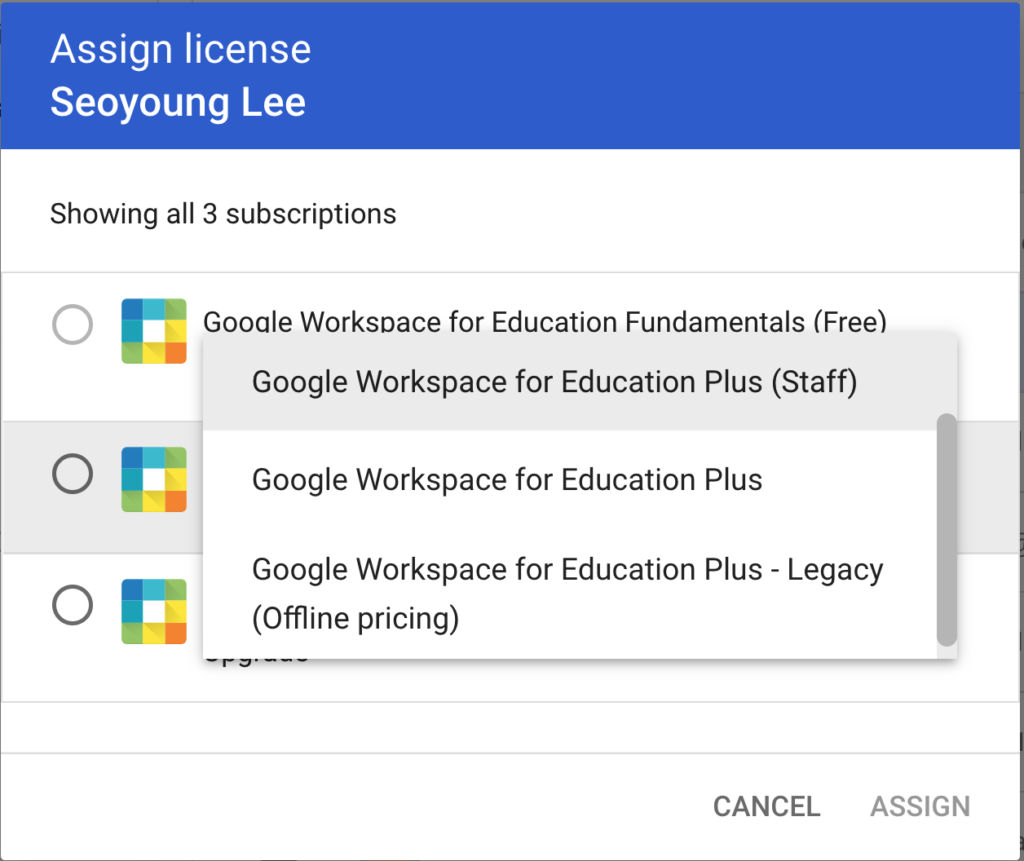
Individual assignment is a great solution for schools and districts with just a small number of licenses to manage.
Automatic assignment (OU)
Pros
- Easy to manage a large number of licenses
- Scaleable
- Can automatically assigns licenses to new users
- non-technical
Cons
- Need to have very strong management of OUs
- Will not remove license of suspended users
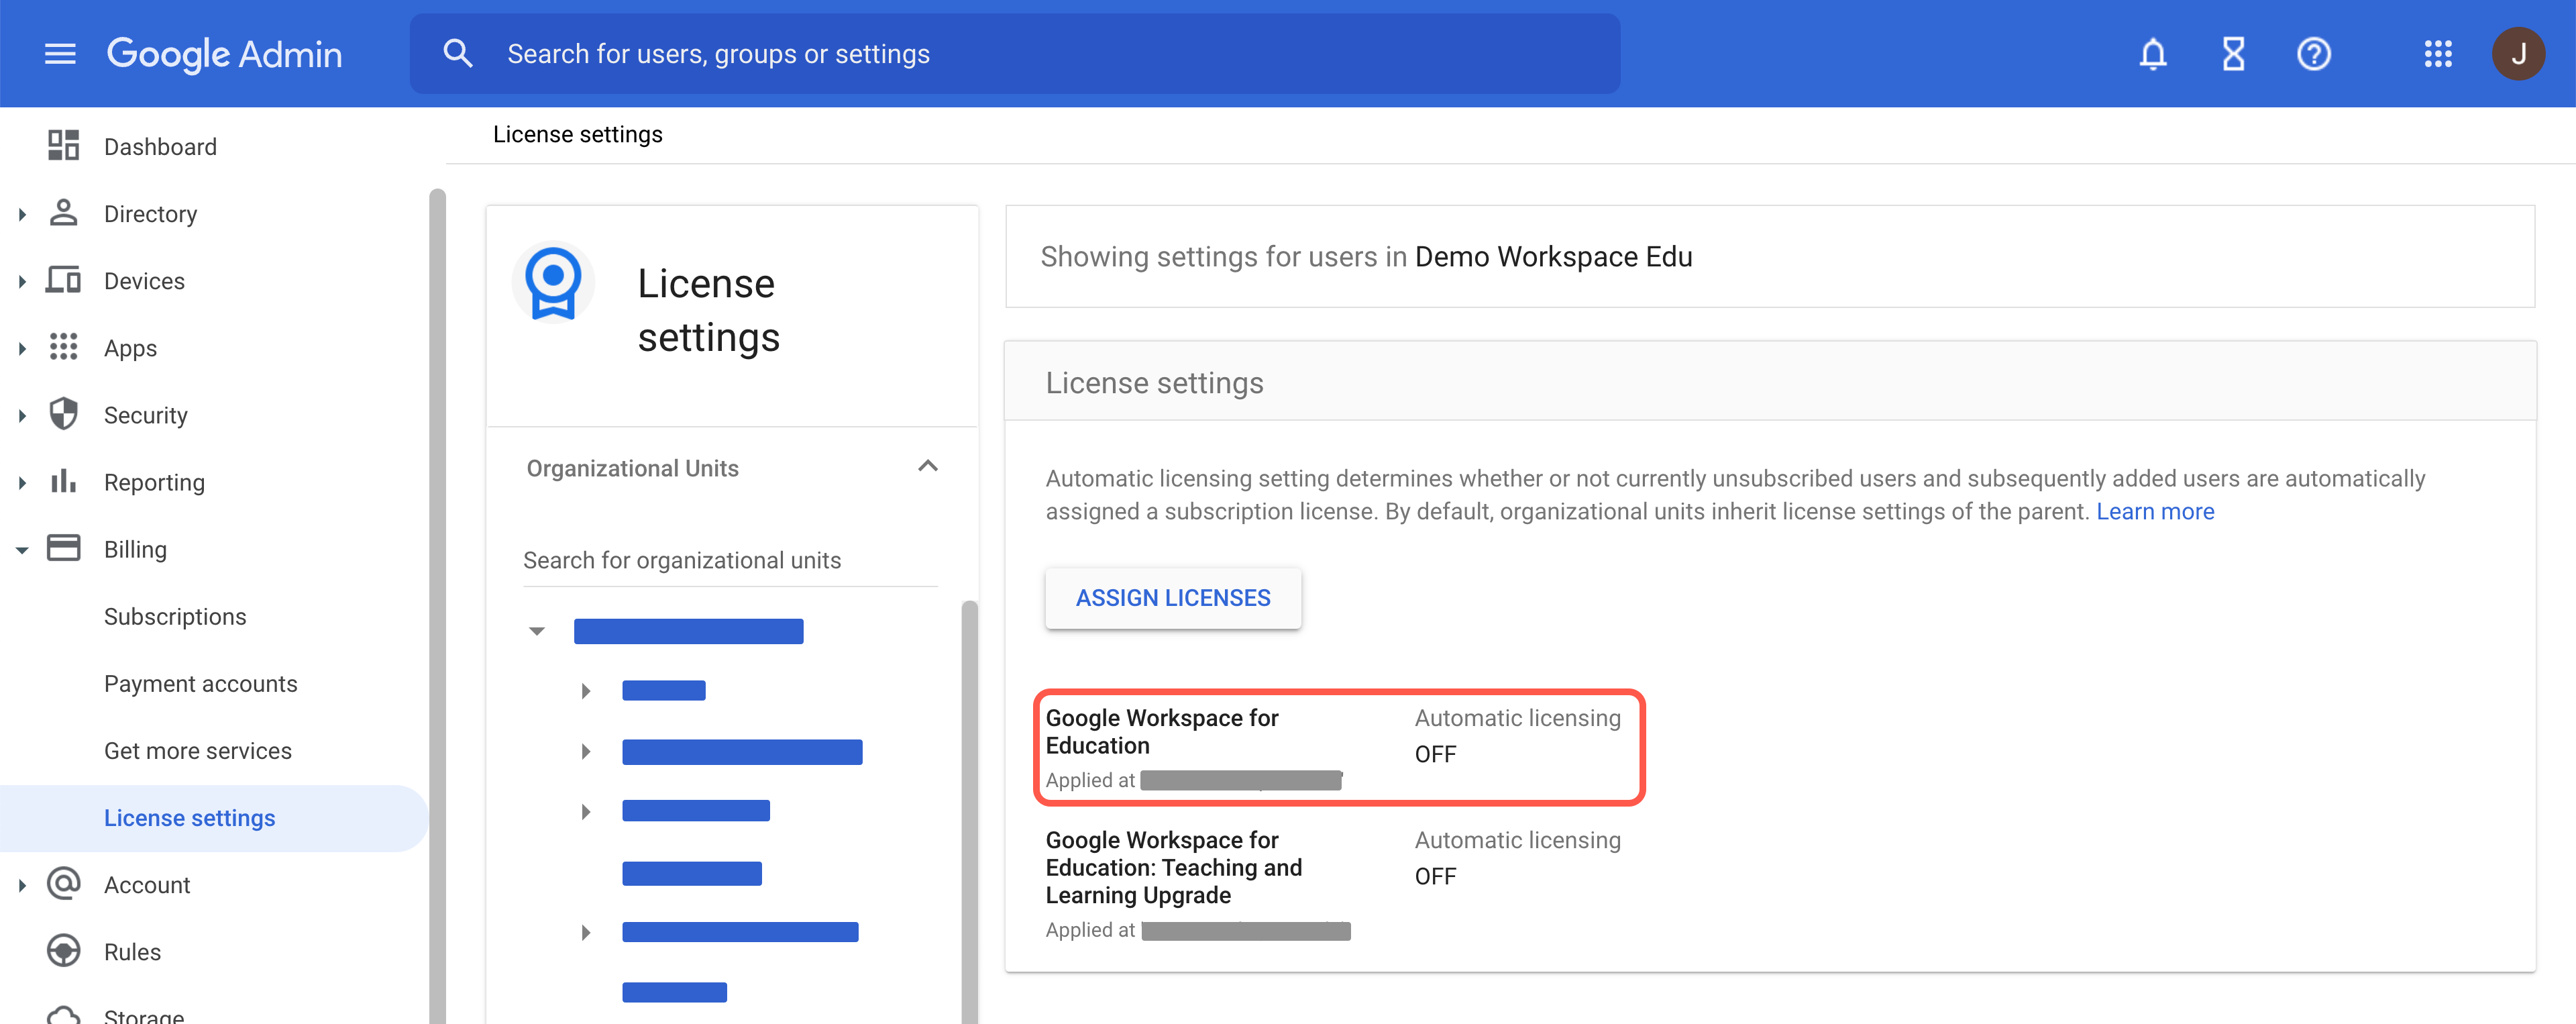
How to assign licenses automatically?
Automatic licensing can be the easiest way to manage licenses if the institution has clear policies about managing OUS. New users will automatically receive a license if the OU they are in has been assigned licenses. The main caveat is that if a user is suspended, the license is not automatically removed. This necessitates a process where suspended users are moved to a separate OU so as to remove their license and free it up for another user.
Navigate to ‘License settings‘ under ‘Billing’. Select the OU to apply automatic licensing, and choose the license to apply to this OU.
If the license has different types (for example, Education Plus and Education Plus (Staff), choose the correct one to apply to this OU and click Save.
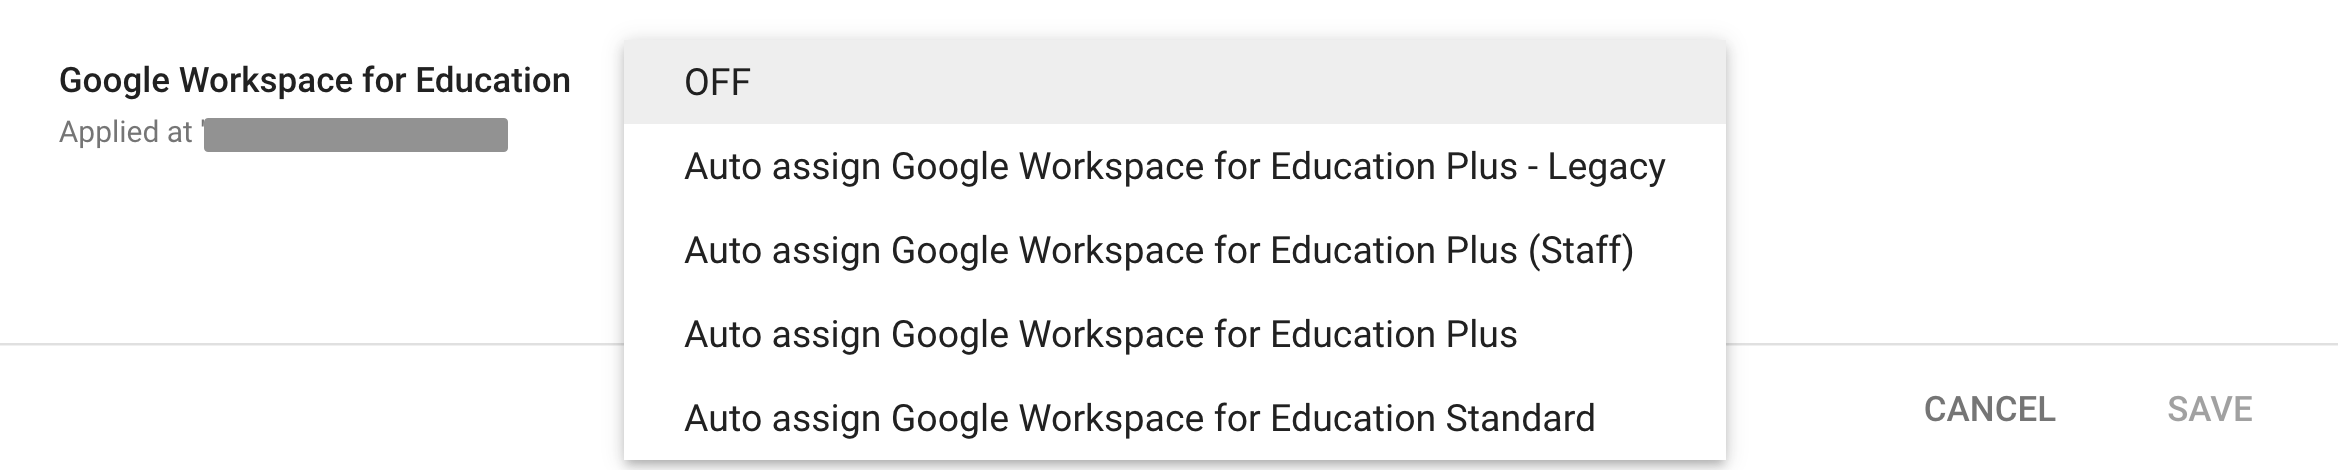
Remember to be aware that all users (including suspended users) will be assigned licenses in this and OU.
CSV Upload
Pros
- Easy to manage a moderate number of licenses (hundreds, not thousands)
- Non-technical
Cons
- Can be time consuming
- Cannot remove licenses with this method
How to assign licenses via CSV upload?
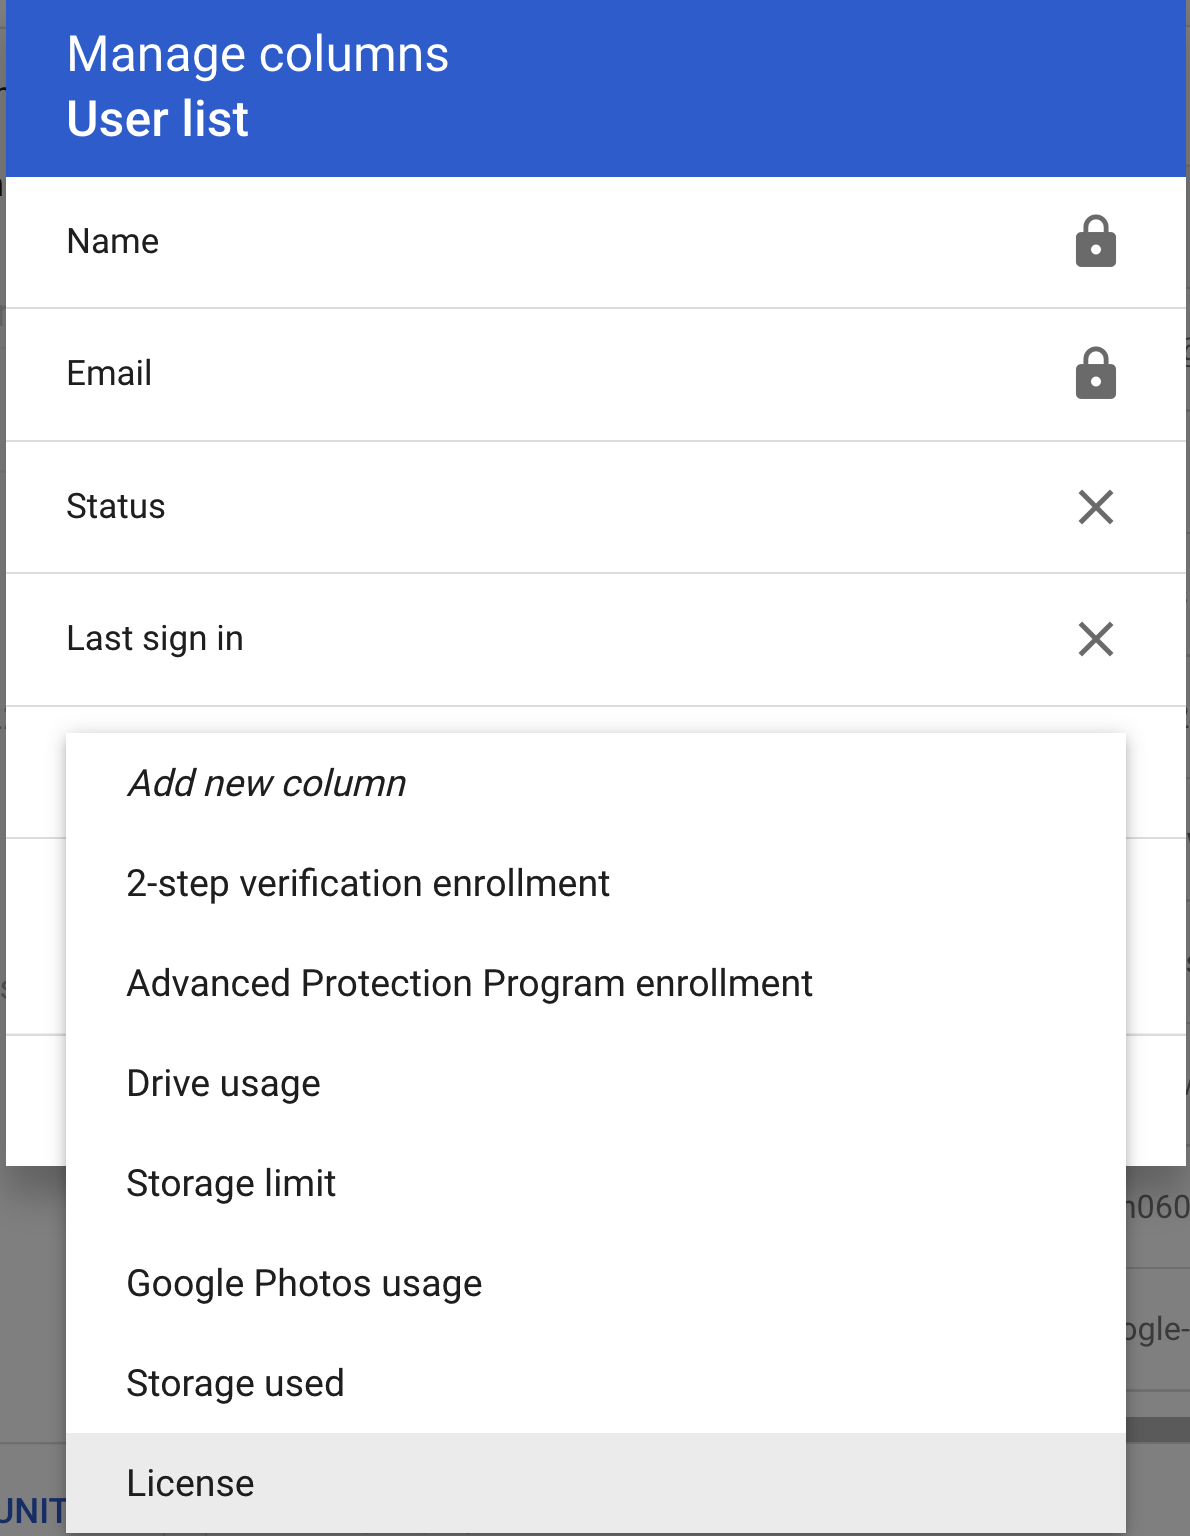
To begin with, you will need a list of users downloaded from the Admin Console along with any current licensing info. To do this you will download a list of users, before doing that you will need to show the license column in the user list. Navigate to the user directory and click the settings icon.

Next select the License item under Add new column.
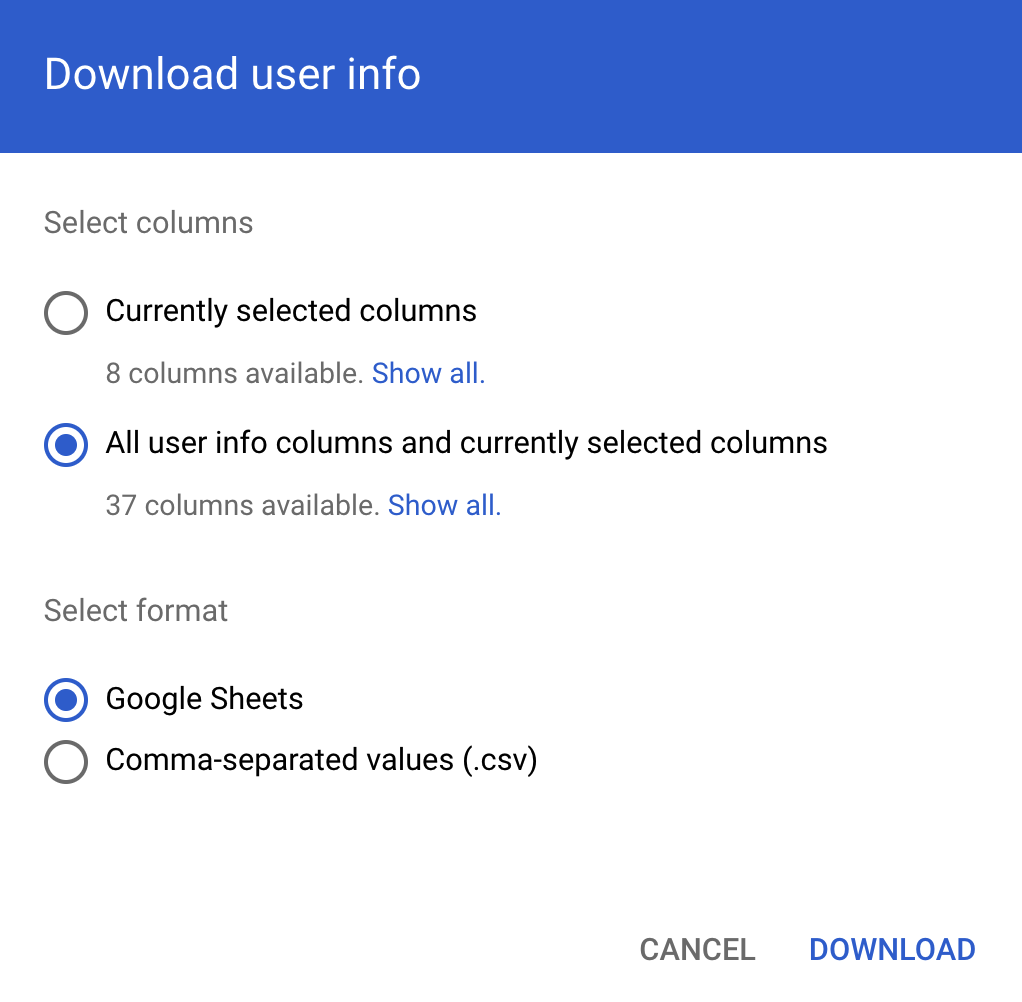
Now you may proceed to downloading a list of users from the User Directory by clicking on Download users.

Ensure the All user info columns and currently selected columns is highlighted, and you may choose to download the list to Sheets or as a .csv.
Open up the downloaded file, and ensure that there is a column New licenses. In this column enter the SKU ID for the license you wish to assign:
- 1010310008 – Google Workspace for Education Plus
- 1010310009 – Google Workspace for Education Plus (Staff)
An updated list of SKU IDs is available here.
Once you have updated this sheet with the respective licenses, download it as a csv and then from within the Admin Console you may now bulk upload users.
GAM
Pros
- Easy to manage a large number of licenses
- Scaleable
- Can automatically assigns licenses to new users
Cons
- Technical skills required
How to use GAM to assign licenses?
GAM is.one of the most powerful tools available to Google Admins to manage their domain. Whilst it does require some familiarity with command line level controls, you will have granular level control of licensing. If you haven’t used GAM before, the below video walks through installing GAM in Google Cloud Shell:
Once you have GAM installed you can apply licenses to a faculty OU using:
Staff/faculty: gam print users query “orgUnitPath=’/faculty’” | gam csv – gam user ~primaryEmail add license 1010310009
Students: gam print users query “orgUnitPath=’/students’” | gam csv – gam user ~primaryEmail add license 1010310008
You can also get around the issue of assigning licenses to all users and suspended users also being assigned a license with:
Staff/faculty: gam print users query “orgUnitPath=’/faculty’ isSuspended=false” | gam csv – gam user ~primaryEmail add license 1010310009
GCDS sync
Pros
- If already using GCDS, syncs to existing database
- Scaleable
- Can automatically assigns licenses to new users
Cons
- Technical skills required
- Requires existing LDAP compatible server (for example, Active Directory)
How to use GCDS to assign licenses?
If schools are already provisioning licenses from an existing database using GCDS, then this option is the best as at simplifies management of users. Licenses can be automatically assigned and also synced to groups.
The clear advantage of using an existing GCDS setup is that admins don’t need to do any additional work in the Admin Console, and Google Education licenses can be both added and removed (since GCDS 4.7.12).
Licenses are connected to group membership in an LDAP compliant server (by choosing the appropriate SKU).
Before you begin:
- You can only set up one license rule for each license edition or storage option.
- If you want to assign a Cloud Identity license, make sure you have added Cloud Identity to your Google Workspace account.
To assign licenses:
- On the Licenses page of Configuration Manager, click LDAP License Rulesand thenAdd Rule.
- In the LDAP Query field, using LDAP query notation, specify the users on your LDAP directory that should be assigned the license.
For details, go to Use LDAP search rules to synchronize data. - Select Assign licenses to Google domain users.
- From the License list, select the license.
- (Optional) To remove the license from Google domain users that don’t match this rule, check the Remove box. Important: If your LDAP configuration isn’t correctly defined, checking the box might result in removing licenses for a large set of users in your account. Check your configuration before running a sync.
- Select one of the following options:
OK—Adds the rule and returns to the LDAP license rules screen.
Apply—Adds the rule and begins another LDAP license rule.
Cancel—Cancels the rule.
Test LDAP query—Tests the validity of the LDAP license query.
